
A Comprehensive Guide to Mastering Rack Position

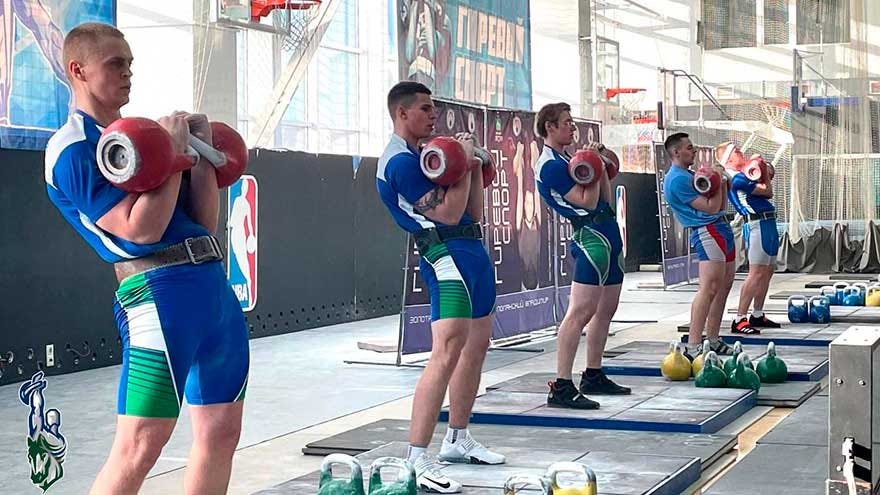
If you’re following my work, you know that I strongly favor double kettlebell lifts in my training. Unfortunately, there is a relatively high barrier of entry due to the technical prowess and flexibility many of the positions demand. Today, I want to provide you with the tools to help you master the most fundamental position. Rack position refers to simply holding the kettlebells on your chest – being proficient in it is of critical importance in the jerk, clean, long cycle, and double half snatch.
A lot of people have claimed that kettlebell sport technique is „too difficult“ to learn for the average person, which has lead to different attempts in making kettlebells „more accessible“ – be it coming up with new disciplines or even modifying / bastardizing the technique entirely (hardstyle).
I strongly believe almost everybody can get to a satisfactory level of proficiency to reap the benefits of double bell works. Look at Crossfit for example – it has thousands of office workers and soccer moms practicing full Olympic lifts. Double bell rack and fixation do demand flexibility, but less than a full barbell snatch for example. If middle aged Bob from accounting can do the latter, he can learn to do the former.
Purpose of Rack Position
The purpose of the position is twofold: firstly, provide a stable platform to transfer force from the lower to the upper body, and secondly, serve as a resting position. Let’s look at those two in a bit more detail.
1. Force Transfer
In the jerk, the majority of the power comes from the lower body. The shoulders are taxed isometrically in top fixation, and the triceps contribute to elbow extension, but some efficient and flexible athletes barely use the upper body. Master of Sport Scott McLaughlin told me that when he used to do over 100 reps with double 32 kg, he could not press a 24 kg kettlebell even one time.
Of course, different athletes have different styles, and there are many examples of burlier athletes using the upper body more – Vladimir Gurov is a good example.
The point is, however, that MOST of the horse power comes from the lower body. Your elbows resting on your hips/torso are the point of connection between the upper and the lower body, allowing for efficient transfer of force with minimum leakage.
Therefore, having solid connection in the rack position sets you up for a maximally efficient repetition.
2. Structural Support
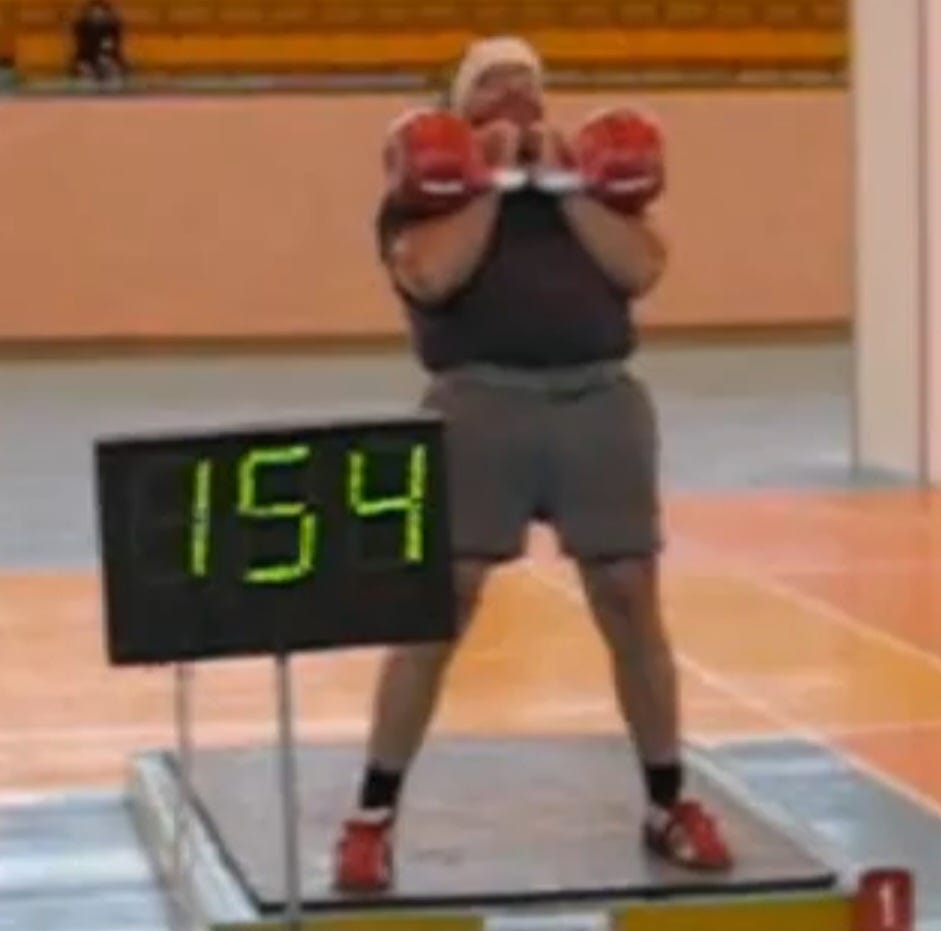
The results elite kettlebell sport athletes demonstrate are simply mind bending – I’m going to use one of my favorite athletes as an example here. Movsar Suleymanov jerked double 32 kg 162 times in 10 minutes, in the 73 kg weight class.
One concept that’s important to understand is that he’s NOT doing one set of 162 reps – he’s doing 162 sets of one rep, while resting in the rack position between each rep. This is a subtle, but important difference. Even at such a high pace, we see there’s a point of relaxation between each rep. The body turns into a natural power rack, and we use our STRUCTURE to support the weight instead of our muscles.
Of course, Suleymanov is a an absolute outlier, you could do HALF as many reps in that weight class and STILL become Master of Sport – but that would also mean you spend TWICE as much time in the rack position. So no matter your level, the more stable and relaxed you are there, the better your result is going to be.
Textbook Rack Position

1. The hips are extended (forward) – this allows for locking out the knees and relaxing the upper legs. If you watch people with a great rack position, you will see straight knees and little tension in the quad muscles.
2. The upper body is leaning backwards, while the natural S curve of the spine is exaggerated: the lumbar (lower) spine is extended while the upper (thoracic) spine is concave (rounded forward).
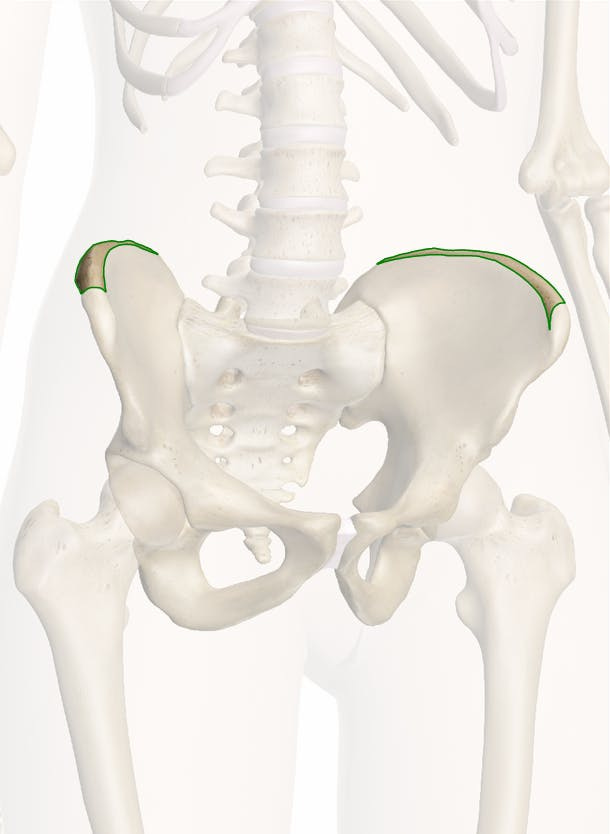
3. Due to the alignment of the spine, the elbows reach the illiac crest – the upper part of the hip bone. This forms a very stable and comfortable connection.
4. The forearms are angled forward a little, so the body of the bells makes contact with the biceps. I’ll expand on this detail towards the end of the article.
5. As you can see, you can draw a straight line from the center of gravity of the kettlebells, right through the elbows, hips, knees, and feet. This ensures it is mostly the skeletal structure supporting the weight.
You can also see that while it may look dangerous at first glance, there is very little actual pressure on the lower back.
Modifying Rack Position for Different Body Types
While there is an „ideal“ body type for success in kettlebell sport – look no further than Ivan Markov – if you look at high level lifters, you’re going to find quite a bit of diversity in terms of anthropometry. Let’s look at a couple of things that may impede athlete’s ability to get into the correct positions.
Short Arms / Long Torso
Obviously, if an athlete has shorter arms in relation to his torso, even with good flexibility, the elbows are not going to reach the illiac crest. Similarly, excessive belly fat can act like obstruction and prevent the elbows from reaching the hip bone as well. While working on flexibility is always important, for many people, placing the elbows on the lower ribs or belly may be the only solution.
I fall into this camp as well – short upper arms combined with anterior pelvic tilt prevent me from getting the elbows all the way down, I have to place them on the lower ribs.
While it is not perfectly ideal from force transfer standpoint, there is a bright side to it as well: the higher starting position, coupled with shorter arms, reduces the distance the bells have to travel each repetition.
Anterior Pelvic Tilt
The position of our pelvis can have a huge influence on how comfortable our rack position is going to be.

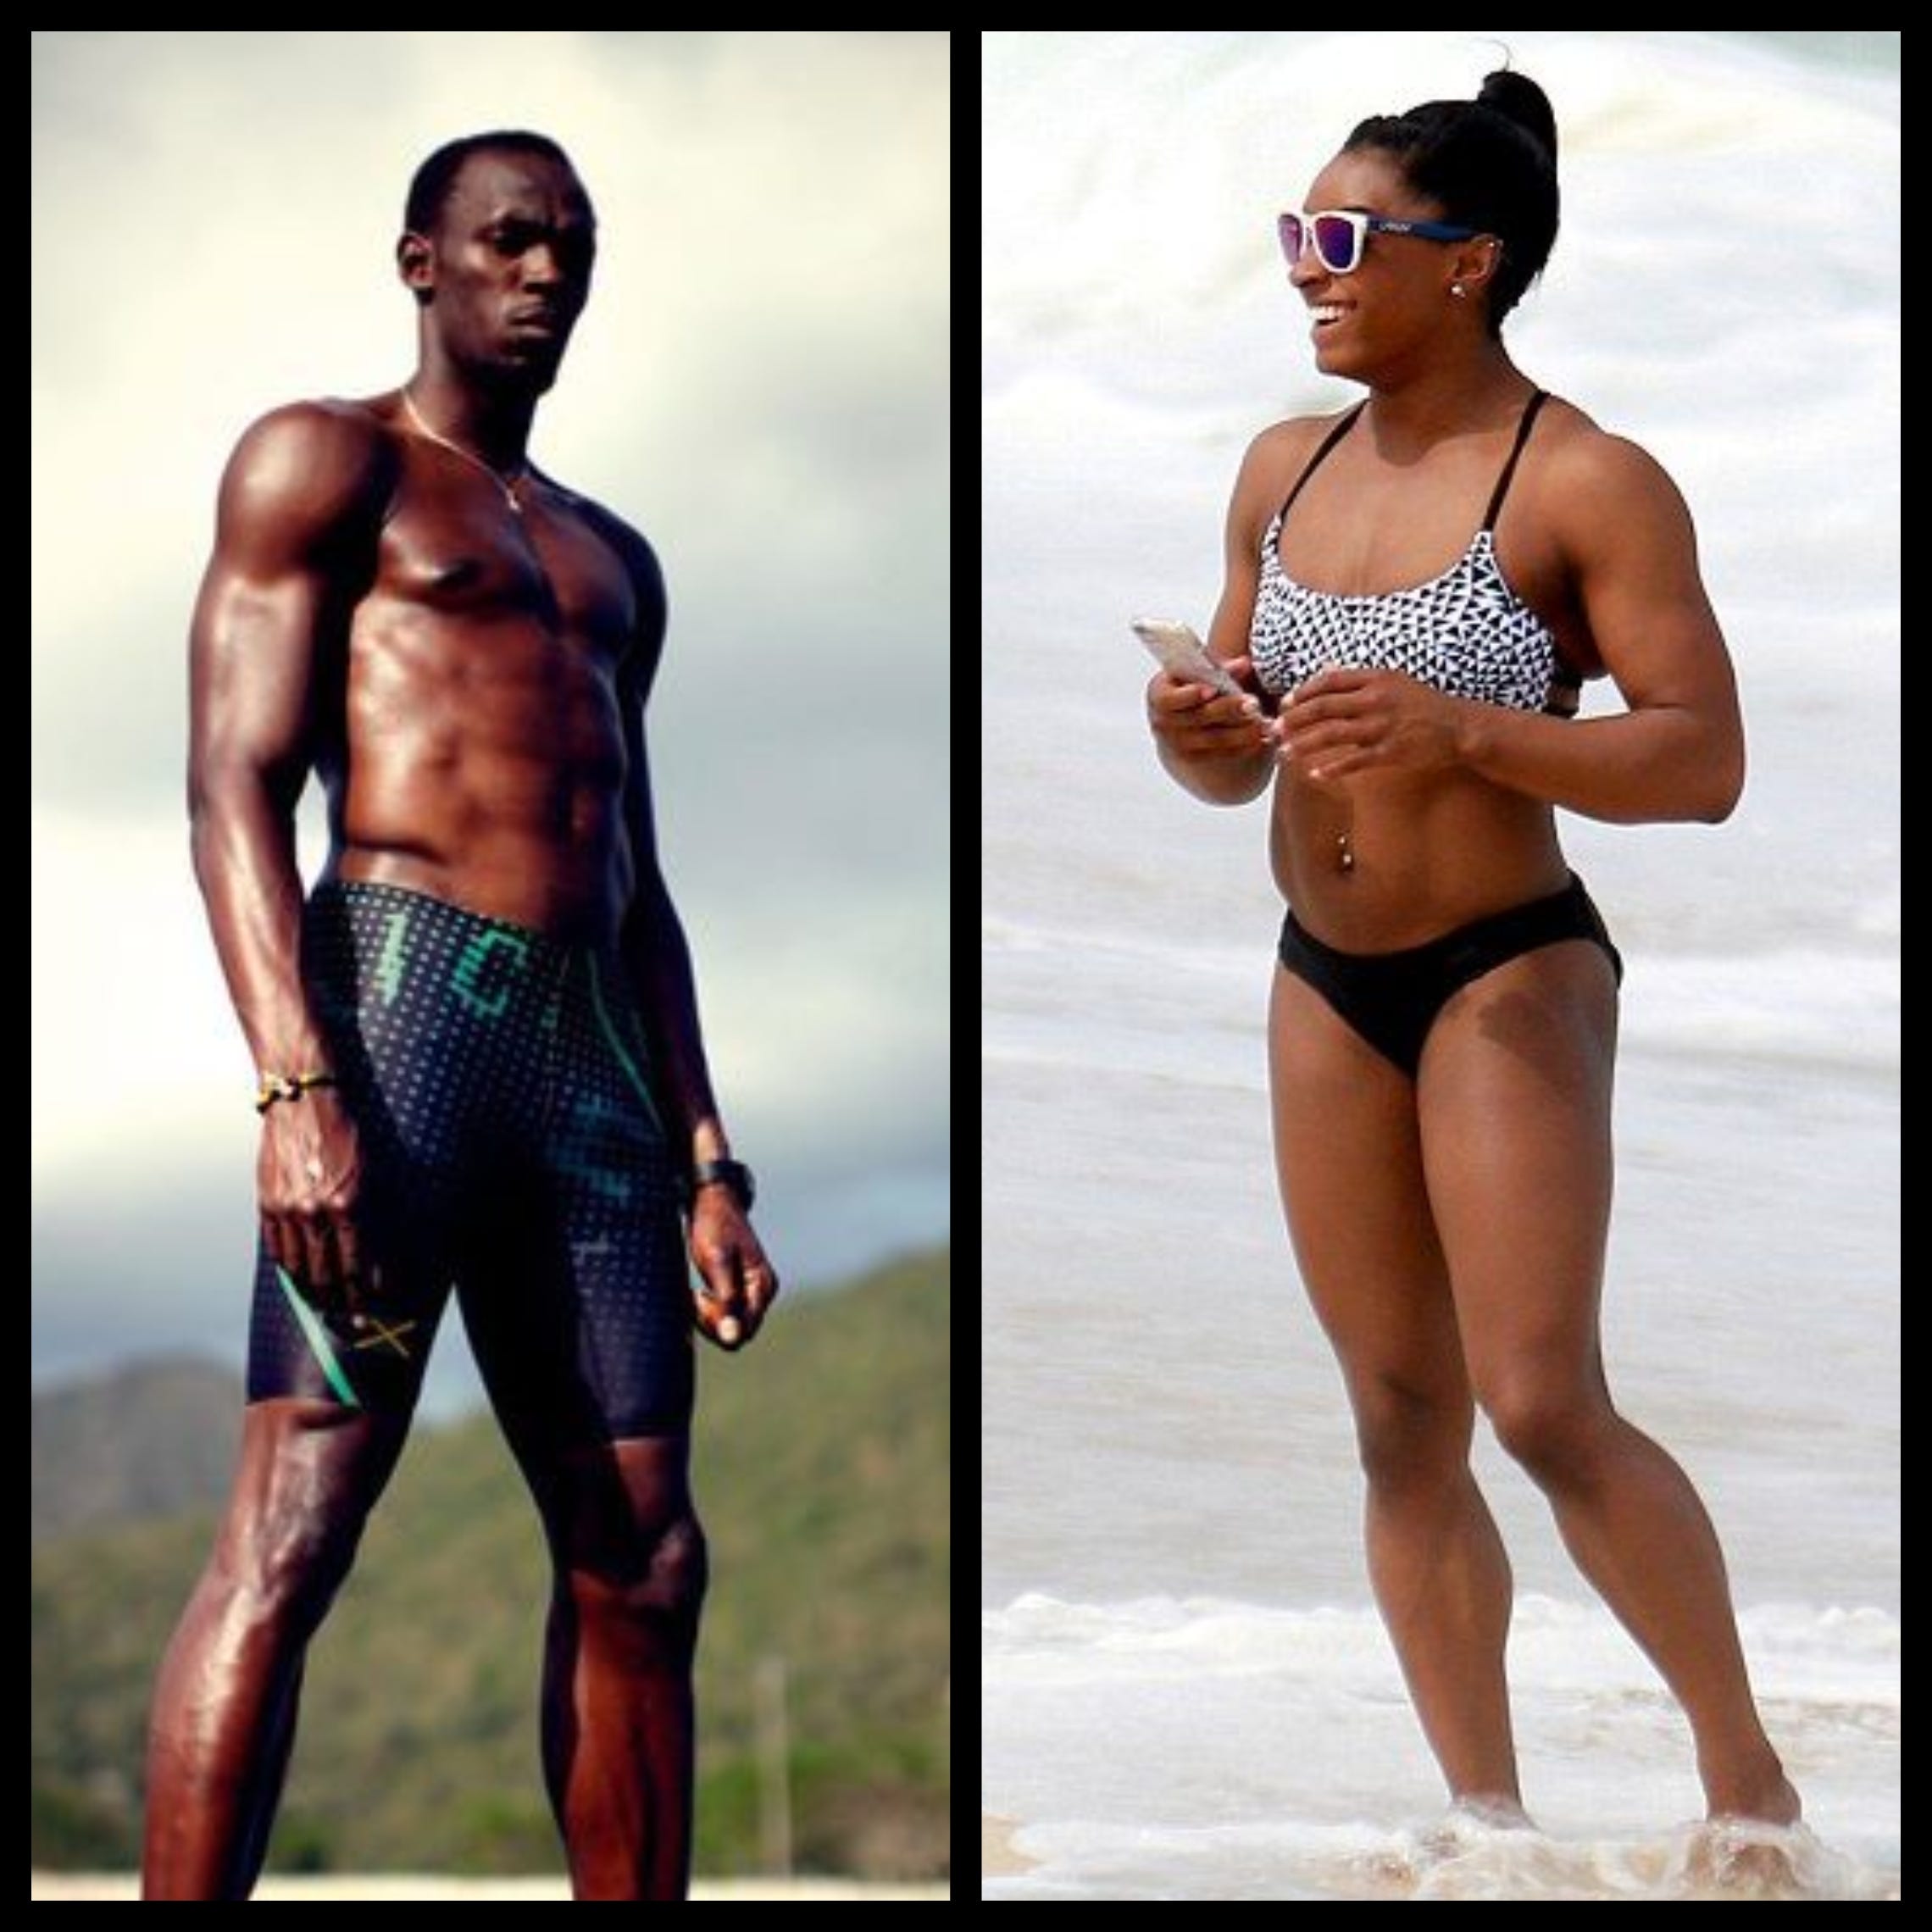
Anterior pelvic tilt refers to the pelvis being tilted forward – you will see that when the person stands up straight, their lumbar spine is going to be flexed with their butt sticking out. I hesitate to call it a dysfunction, I’d rather call it anatomical diversity – it’s extremely common the general population, athletes, and girls taking pictures off their butt in the mirror.
On a serious note, APT is typically seen in power athletes like sprinters, and may be conducive to better glute activation, and therefore, better performance. For example, both Usain Bolt and Simone Biles clearly display a degree of anterior tilt:
You can see the problem here: if your butt is sticking out when you’re standing up straight, you will not be able to place your elbows on your hips during kettlebell jerks. As a consequence, you have to compensate by slightly bending your knees to angle your illiac crest upwards.
Common suggestions for getting rid of APT are core training & stretching the hip flexors – those are things I recommend to any athlete, but it is unlikely that you’re going to completely eliminate APT if you’re predisposed to it, like I am myself.
On the contrary, if you have POSTERIOR pelvic tilt, you’re likely going to find rack position ridiculously easy. Also, I hate you (but I’m probably a better sprinter than you).
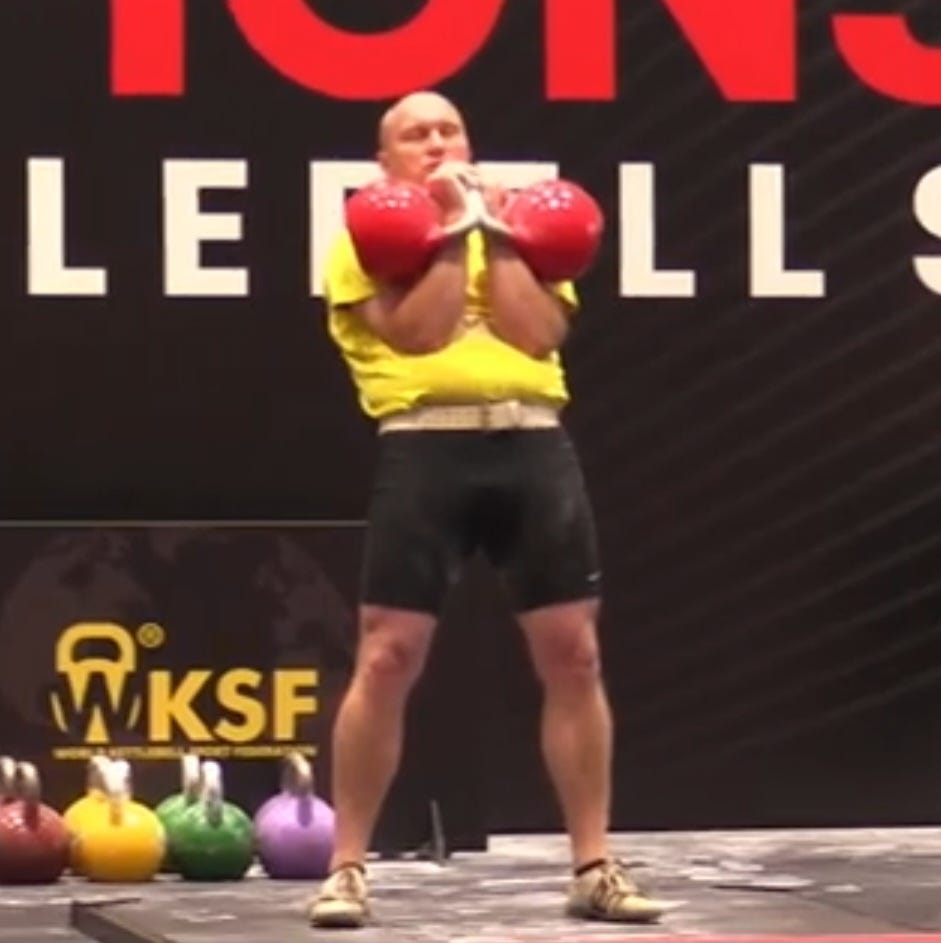
Barrel Chest
In some individuals, the chest can be so well developed that it presents a physical obstruction. Think of the type of person best suited to set world records in the bench press: short limbs and extremely sturdily built chest and shoulder girdle. In that case, there is no way the elbows are ever going to make contact, and the forearms have to rest on top of the chest. Of course, this is far from optimal – however, on the bright side, those individuals tend to possess a lot of raw strength in the upper body, and that can often compensate for the mechanical disadvantage.
In fact, one of the legends and pioneers of kettlebell sport, Sergey Mishin, used this exact technique:
The Single Most Important Concept
By now, you probably have noticed the common thread between all of those positions: they all strive to maximize ELBOW-TORSO CONNECTION as much as possible. This is the most important concept to achieve the goals of rack position: force transfer and structural support (as discussed above).
Locking Out the Knees
Since the rack is supposed to be a resting position, we want to relax our muscles as much as possible – we use PROPORTIONATE TENSION to hold the position, and not an ounce more. That means that ideally, the legs are completely straight with the knees locked out, so there’s minimal tension in the quads. However, depending on flexibility and the anthropometric factors discussed above, this may not be achievable for everyone.
In fact, only a few lucky individuals are going to be able to get their knees straight right away, and many people will never get there. However, this shouldn’t discourage you, because you can still get to a high level. For instance, one of the greatest lifters of all time, the legendary Denis Vasiliev, doesn’t lock out his knees completely in rack position:
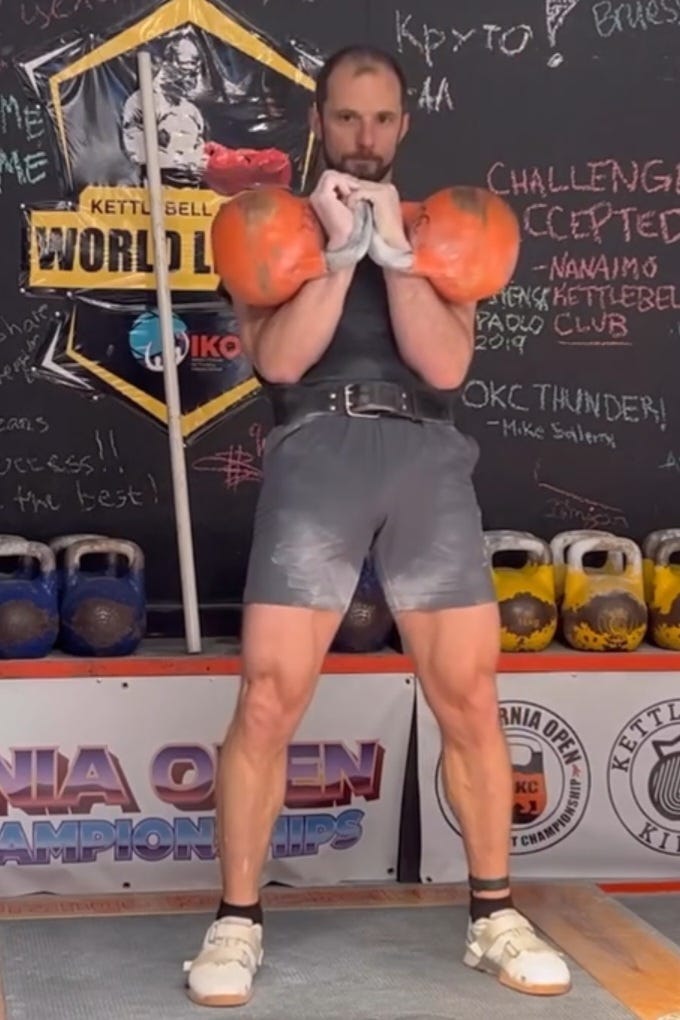
The downside is that it’s always going to hurt a bit more – the upside is that you’ll have to build massive quads just like Denis, and let’s be honest, that ain’t a bad thing either.
Stance Width
I’m going to keep this short – any comfortable stance is fine. You’re going to find your ideal stance over time. At the highest level, people use all kinds of different stances, from close (Khvostov) to medium (Markov) to very wide (Sulyemanov). Experiment.
Hand Insertion
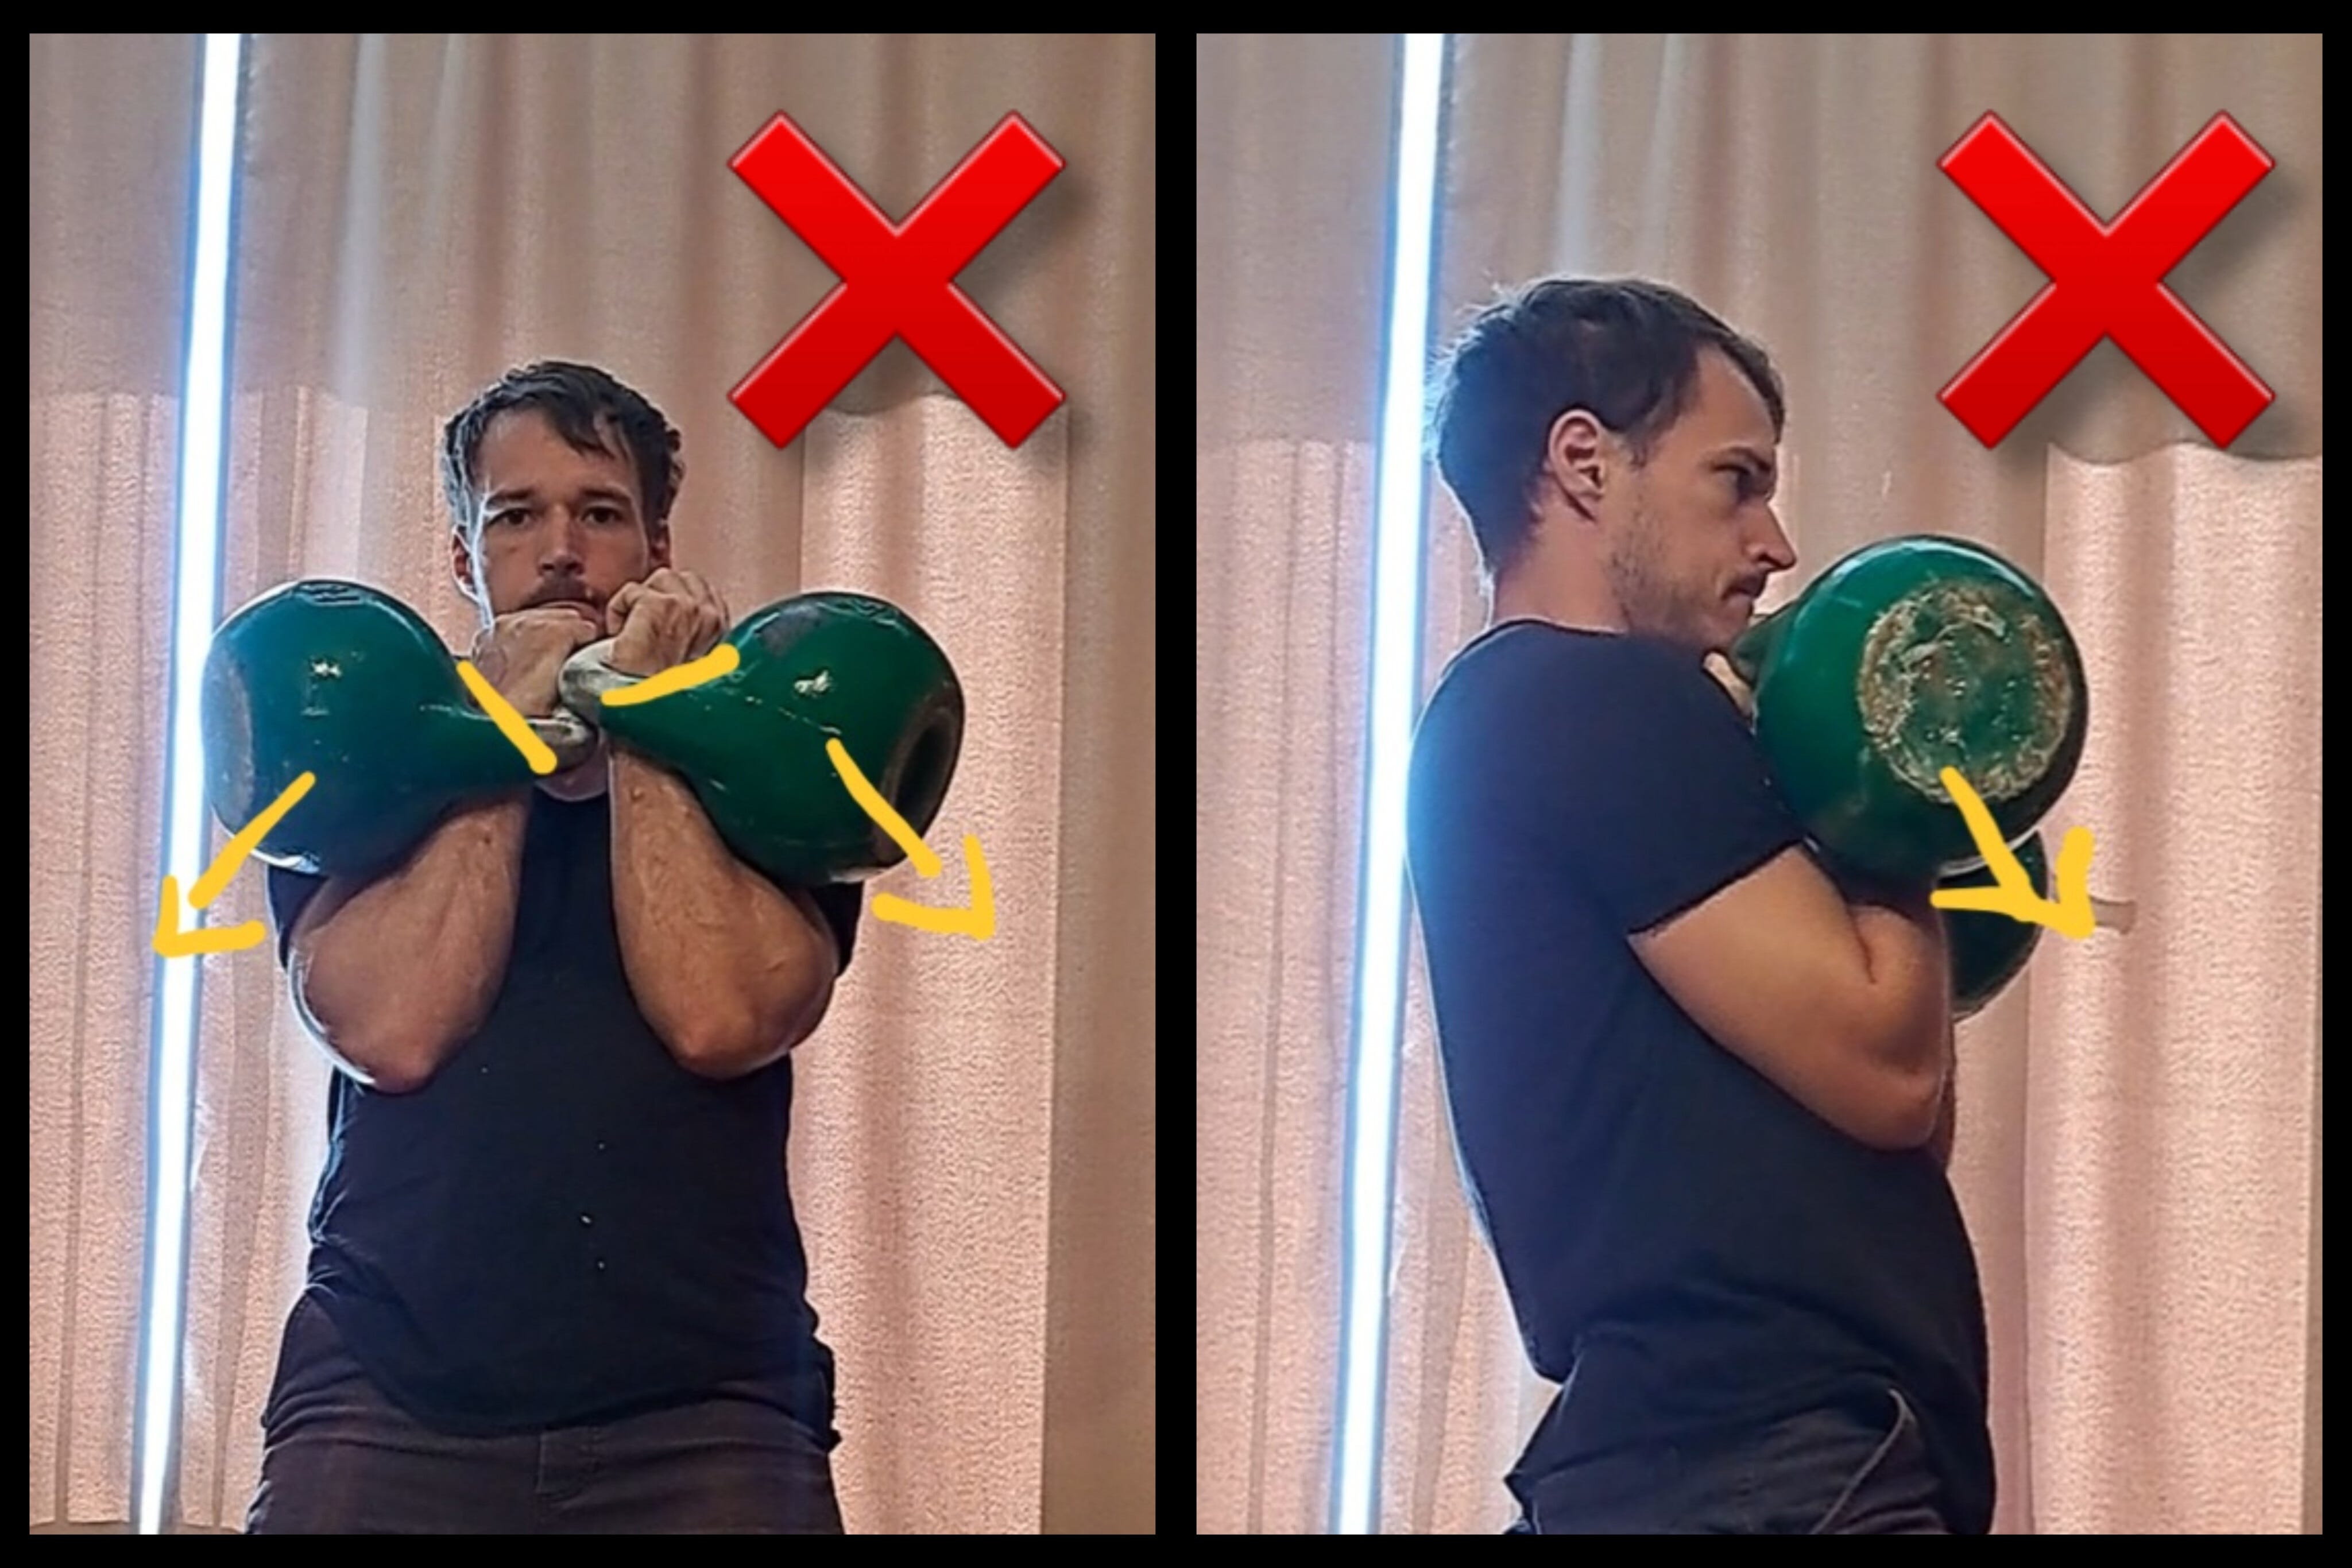
Hand insertion refers to the way the kettlebell handle is positioned in the hand. The most common mistake we see is positioning the handle straight across the palm:
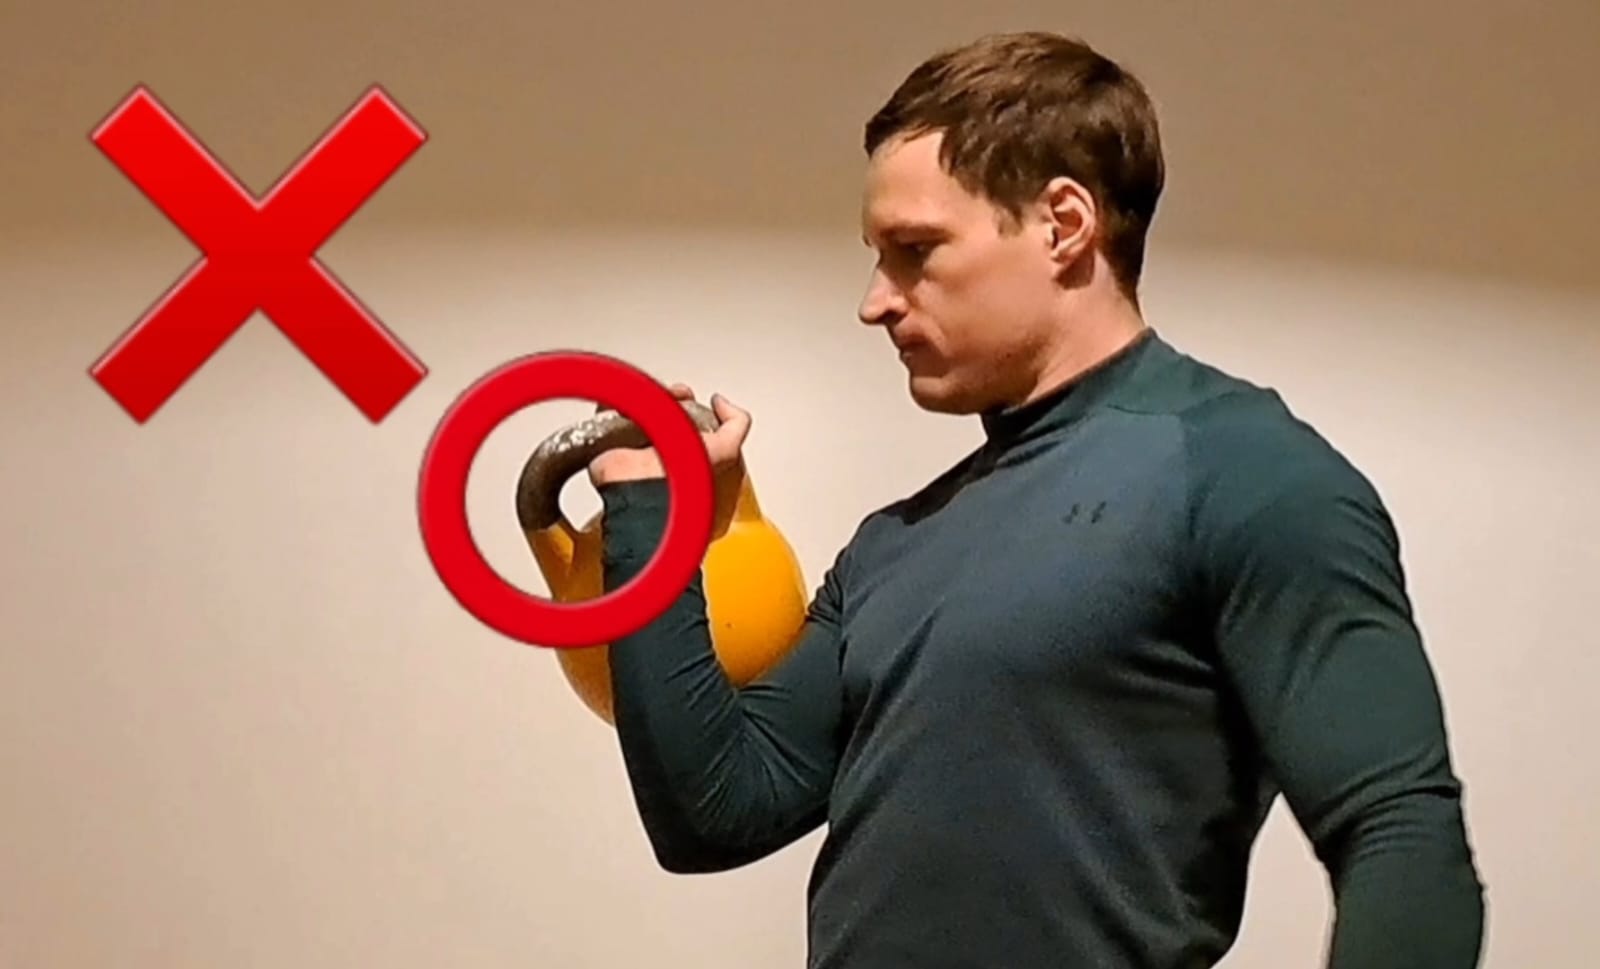
You can easily identify this mistake because there’s a big gap between the lower part of the forearm (ulna) and the lower horn of the kettlebell. This leads to instability, as well as excessive extension of the wrist (bending backwards).
Instead, the correct position is with the handle positioned DIAGONALLY ACROSS the palm:
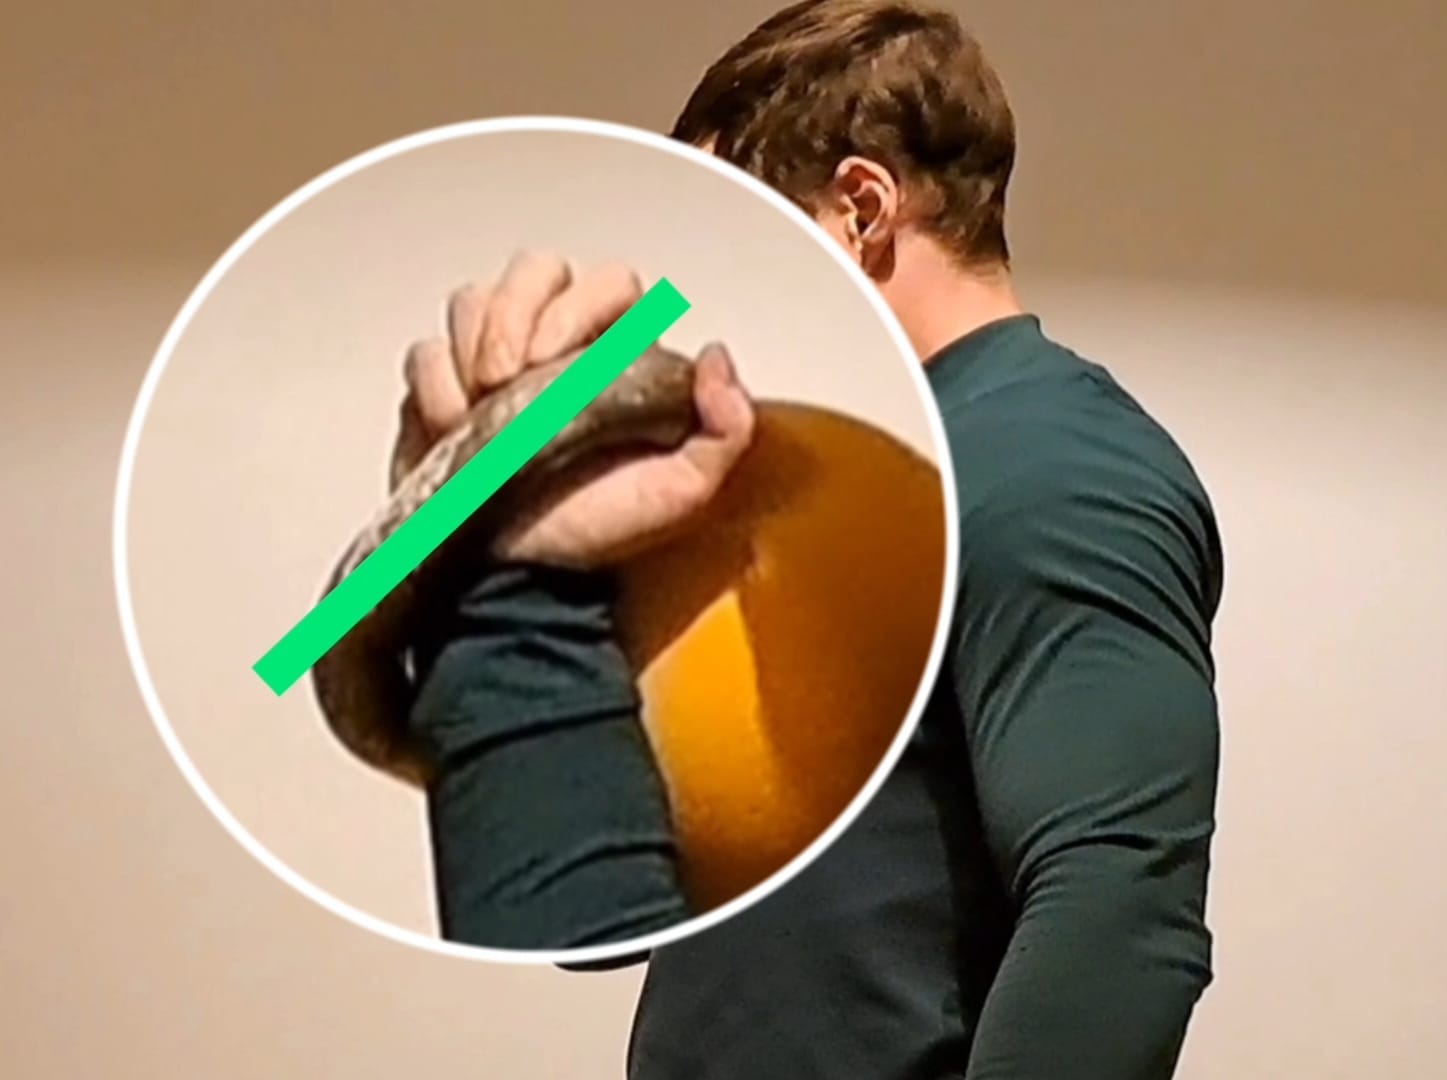
This allows for a much more stable position because we have one more point of contact with the kettlebell: as you can see, the space between the ulna and the kettlebell handle is now closed.
The wrist is extended (bent) backwards just slightly. This is a very stable position that’s going to minimize dangling around of the kettlebell around during the jerk.
The „Lock“
This technique adds additional stability and allows for better relaxation of the arms. It involves stacking the kettlebell handles on top of each other and overlapping the fingers like so:
It doesn’t matter which side goes on top, go with whichever way feels more comfortable. Practice going right to the lock whenever you drop the bells from top fixation.
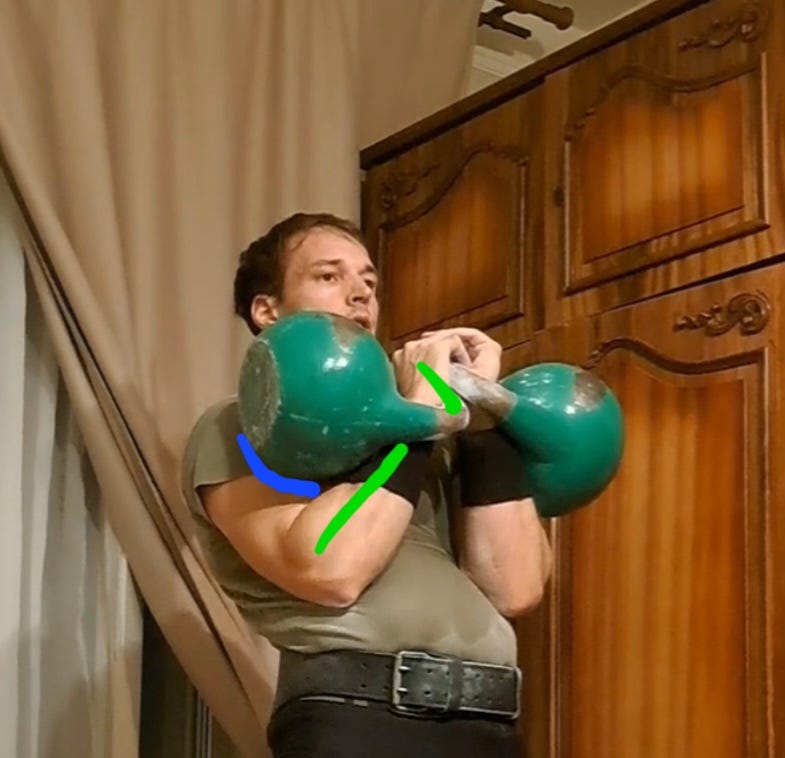
Forearm Alignment
One of the most common mistakes is keeping the bells too close and having the palms face your body, like in a bicep curl. This leads to the center of gravity of the bells drifting away from you, and you’re going to need more strength to hold the position:
Instead, you want the palms facing each other or slightly facing away from the body. At the same time, the upper body was to lean back, while the forearms angle forward slightly. This allows a balanced position with the bells partially resting on the biceps:
A Word on Equipment
The number one piece of equipment you need for a good rack position is a cotton T shirt. Synthetic materials are no good because your elbows are going to slip. The shirt should be neither too lose nor too tight.
Secondly, you’re going to some kind of spray bottle and fill it with water, and use that to moisten your shirt right where your elbows are going to sit. It may sound counterintuitive, but it’s going to make everything MUCH stickier and more comfortable. Or you can go the Neanderthal route and just pour water straight onto the shirt.
Next, generous application of chalk isn’t going to hurt either. You can chalk your hands, forearms, elbows, and even the shirt, basically all points of contact. Remember, friction is your friend. Where and how much chalk you use is up to your discretion, experiment.
Last but certainly not least, the belt. Some people with ideal leverages can do without one, but for most, the belt is going to help considerably. A simple leather belt will do – keep in mind that, according to competition rules, it can’t be wider than 12 cm in the back.
The belt is worn tightly around the hips and lower back, below the belly button. Its job is to support the lower back, we’re not doing any kind of powerlifting breathing techniques in kettlebell sport!
Exercises to Improve Rack Position
This article is already getting long, so I might write a separate one that goes more in-depth, but from the mechanics of the movement we can easily deduce what we need to work on:
hip extension: all kinds of hip flexor stretches, specifically those where the knee is straight
thoracic flexion: rounding the upper back forward – static stretches as well as Jefferson curls
Additionally, a commonly performed assistance exercise are static rack holds – just picking up to kettlebells and holding them there. I think those are mostly useful for beginners, and there’s no need to overdo them. Sets of 1-2 minutes are enough just to get a feel for the position. Once you’ve found some comfortability, I believe your time is best spent just doing longer sets of jerk, long cycle, and double half snatch – you’re going to accumulate enough time in rack position that way!
Conclusion
Developing a good rack position is crucial for successfully using kettlebell sport training methods. I believe that with the correct approach, most people can get proficient enough to really reap the benefits.
Understanding the mechanics, doing some flexibility work and spending time getting comfortable with the position is really all it takes.
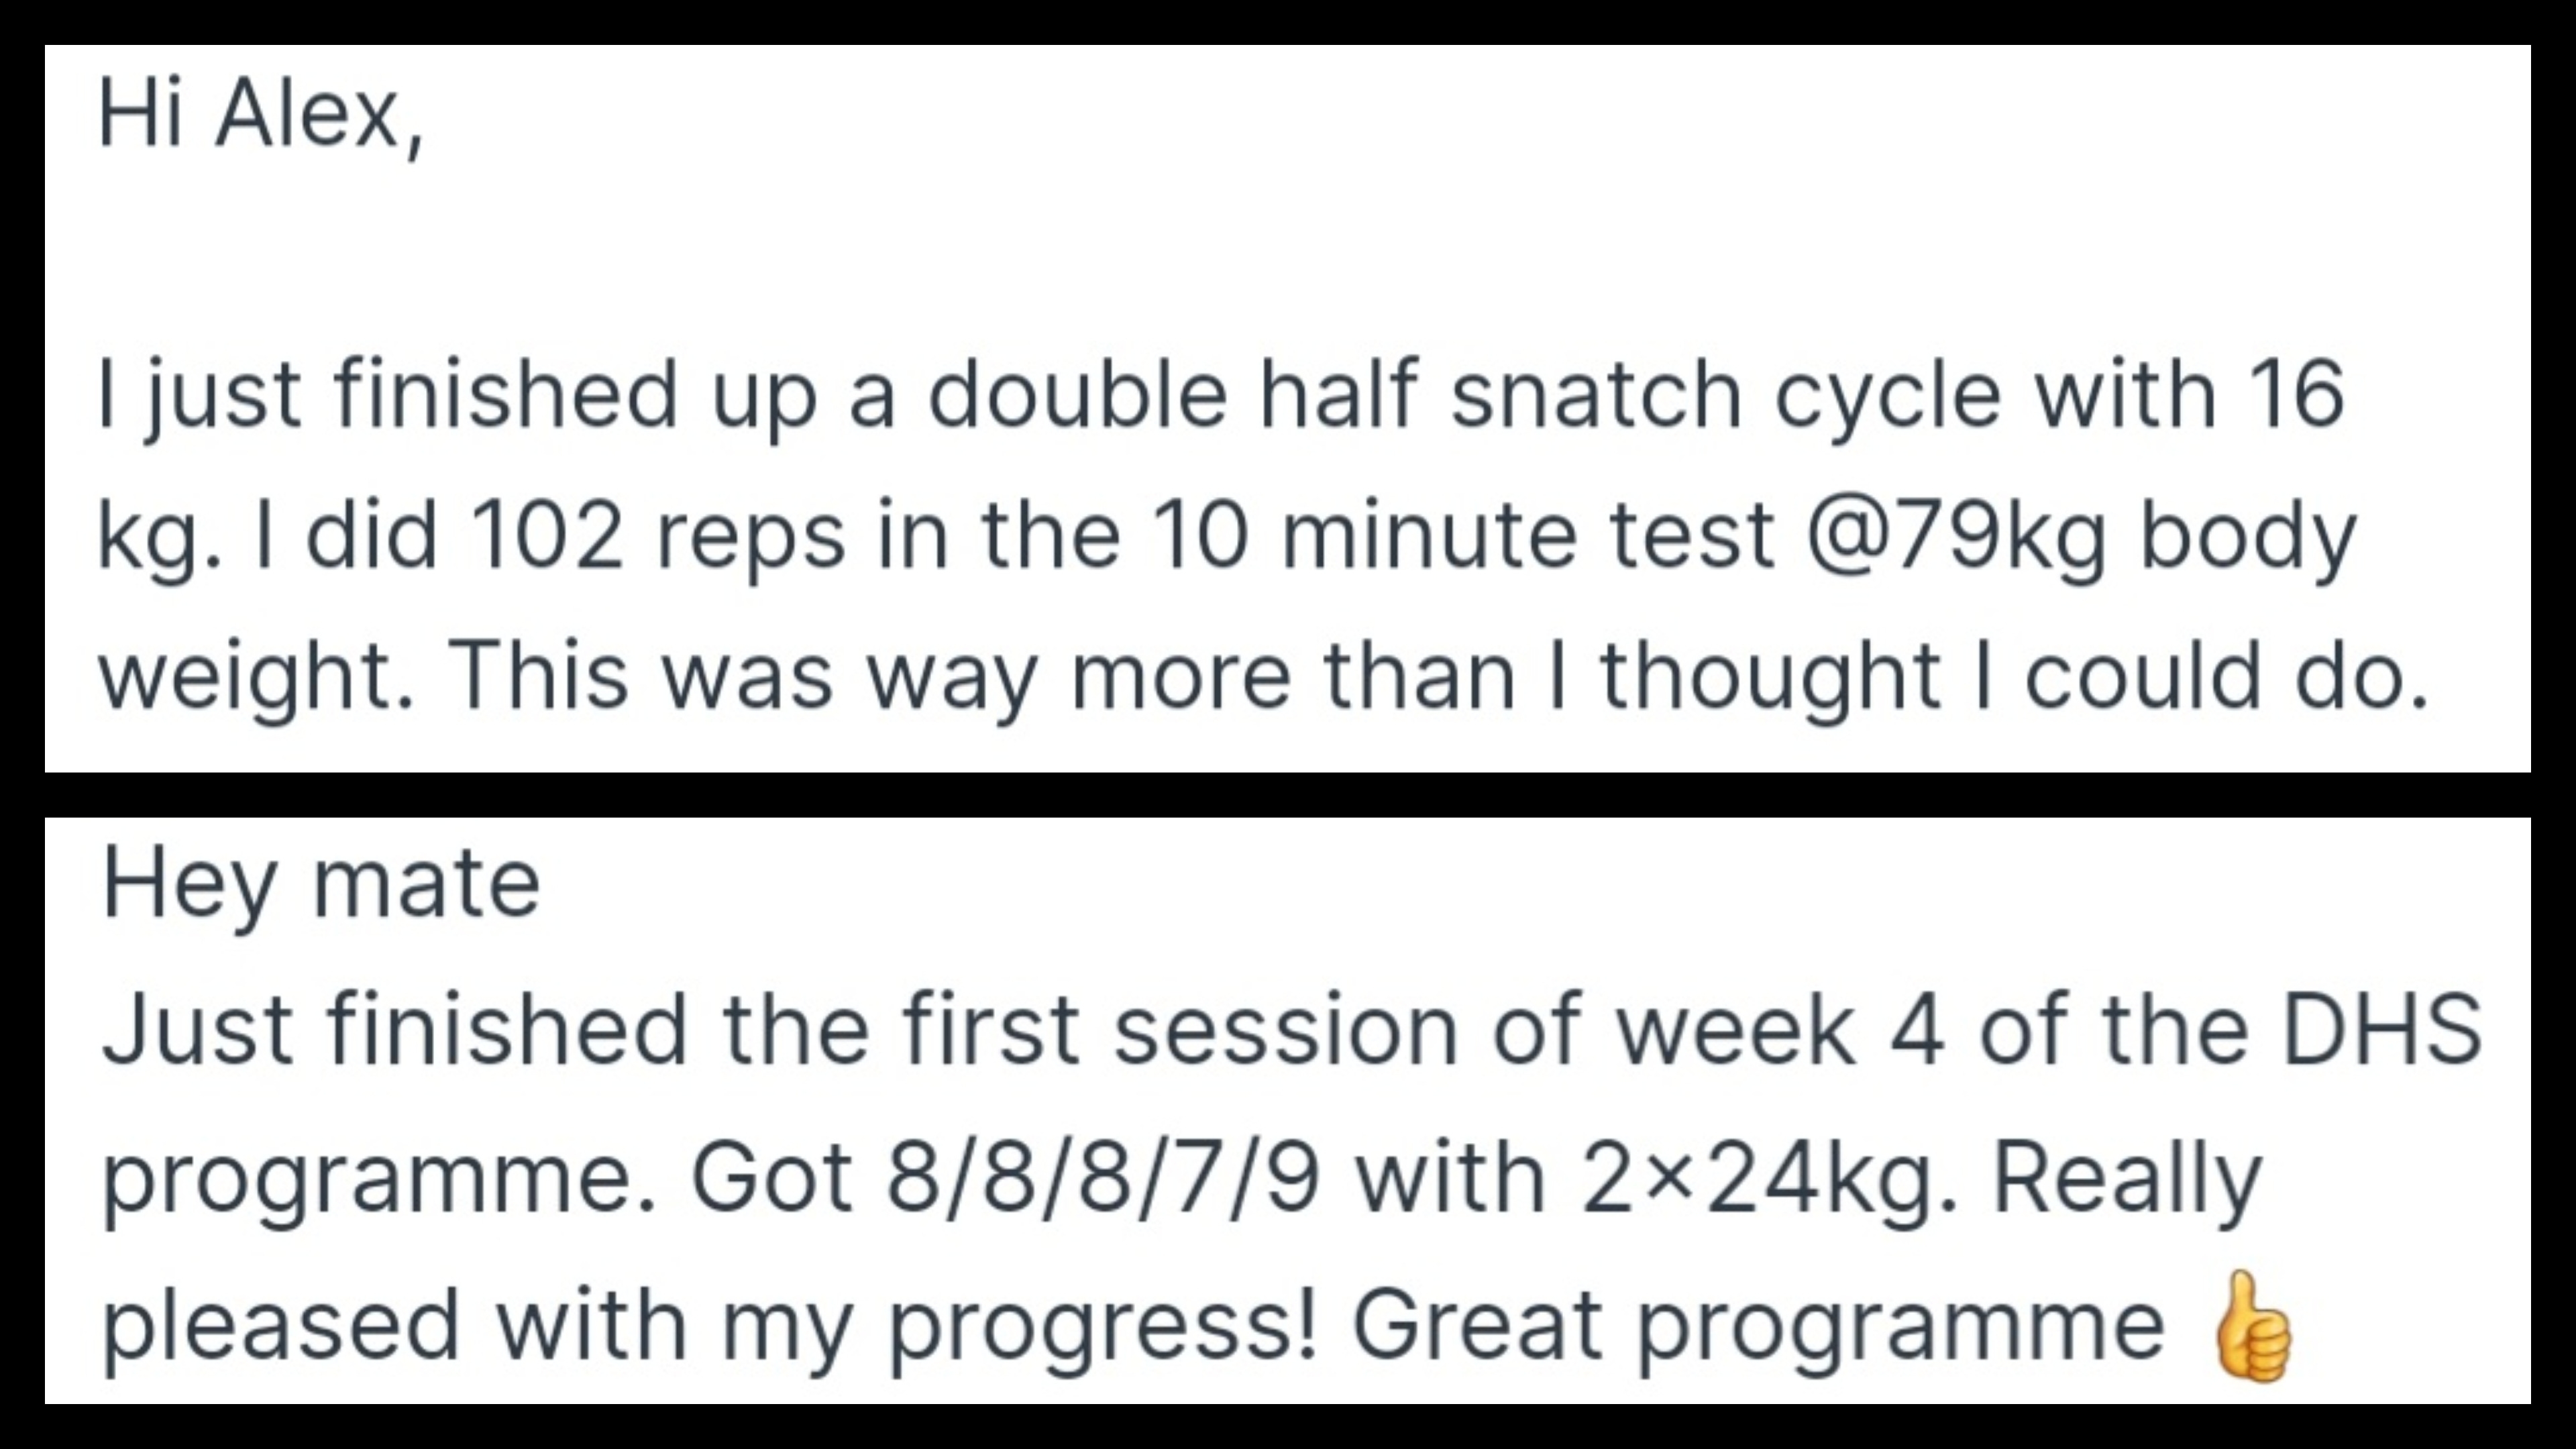
If you’re looking for double bell programming, I highly recommend checking out my Double Bell Domination plan. I’ve only launched it a couple months ago, but people are already reporting back with great results:
Wishing you all a fantastic weekend,
Alexander